價格:免費
更新日期:2017-05-22
檔案大小:16.8 MB
目前版本:1.03
版本需求:需要 iOS 10.1 或以上版本。與 iPhone、iPad 及 iPod touch 相容。
支援語言:英語

A friend of mine wanted a good WiFi remote control app for her garage door and lamps. So I made WioSwitch.
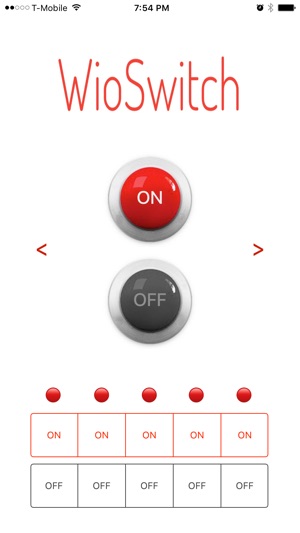
WioSwitch is a simple, easy-to-use, and reliable app. With WioSwitch, you can control your ESP8266, ESP32, Wio Link, Wio Node, Arduino Uno with Wifi Shield, Arduino Yún, Arduino MKR1000, WeMos D1 R2, WeMos D1 mini, WeMos D1 Mini Pro, Amica, DOIT, NodeMCU, and Raspberry Pi Development Board from anywhere in the world.
The WioSwitch app creates up to 11 WioSwitches for use with up to 11 devices. DIY, tech-savvy users can control their TV, ceiling fan, toaster, sprinklers, lamps, garage door and other household appliances with the touch of a WioSwitch button.
Requires:
1. ESP8266, ESP32, Arduino MKR1000, Raspberry Pi, Raspberry Pi Zero W, NodeMCU, Amica, DOIT, WeMos, Wio Link, or Wio Node Development Board.
2. Arduino IDE.
3. WiFi Network.
How To Use:
1. Run an ESP8266 Webserver. Hook up the wires with the relay or LED.

You can download the sketch file from https://github.com/marcoschwartz/aREST/tree/master/examples/ESP8266_cloud_and_local for your Development Boards
Or for local use only you can download the WioServer sketch file for your NodeMCU, Amica, DOIT, WeMos Development Boards from https://github.com/WioSwitch/WioServer/blob/master/WioServer.ino
2. Open the WioSwitch App.
3. Scroll down, tap the "Unlock" button.
4. Enter your ESP8266 Webserver IP address (pinMode, digitalHigh, and digitalLow)
Local Example: (https://github.com/WioSwitch/WioServer/blob/master/WioServer.ino)
A. http://192.168.1.254/d0output
B. http://192.168.1.254/d0on
C. http://192.168.1.254/d0off

Cloud and Local Example: (https://github.com/marcoschwartz/aREST/tree/master/examples/ESP8266_cloud_and_local)
A. https://cloud.arest.io/deviceName/mode/4/o
B. https://cloud.arest.io/deviceName/digital/4/1
C. https://cloud.arest.io/deviceName/digital/4/0
5. Tap the "Done" button.
6. Tap the desired number (from 1-10) to assign the WioSwitch you want to set up.
(Tap the "Garage" button to initialize the Big Red button just like a Garage Door Remote Controller.)
(Tap the "Lamp" button, the Big Red ON Button and the OFF Button will just like normal ON/OFF switch.)
7. Tap the "On" and "Off" buttons to switch the relay / LED lights on or off.

8. Tap the "Lock" button to hide other prompts and prevent children from tampering with the set-up.

支援平台:iPhone
